Have you ever wanted to create a menu driven PowerShell GUI to conduct a series of automated tasks? You are in luck, because that is exactly what we are going to cover in this post. This very simple PowerShell GUI will help you easily distribute your code to other team members or maybe you just want to make your life easier.
To further enhance your simple PowerShell GUI, take a look at my Out-GridView blog post.
Lets jump right into the code
Start out by formatting the menu the way you want it; put something descriptive in for the menu title. Modify lines 1 to 6 with information for your GUI project. You can also add or remove lines based on how many menu items you need. Lines 13 to 17 need to be modified to reflect the functions that you want to call when a specific number is entered. More on the functions below.
Menu Code:
Write-Host "~~~~~~~~~~~~~~~~~~ Menu Title ~~~~~~~~~~~~~~~~~~" -ForegroundColor Cyan
Write-Host "1: Enter 1 to execute Function One"
Write-Host "2: Enter 2 to execute Function Two"
Write-Host "3: Enter 3 to execute Function Three"
Write-Host "4: Enter 4 to execute Function Four"
Write-Host "5: Enter 5 to execute Function Five"
Write-Host "Q: Enter Q to quit."

$input = (Read-Host "Please make a selection").ToUpper()

switch ($input)
{
    '1' {Function_One}    ### Input the name of the function you want to execute when 1 is entered
    '2' {Function_Two}    ### Input the name of the function you want to execute when 2 is entered
    '3' {Function_Three}  ### Input the name of the function you want to execute when 3 is entered
    '4' {Function_Four}   ### Input the name of the function you want to execute when 4 is entered
    '5' {Function_Five}   ### Input the name of the function you want to execute when 5 is entered
    'Q' {Write-Host "The script has been canceled" -BackgroundColor Red -ForegroundColor White}
    Default {Write-Host "Your selection = $input, is not valid. Please try again." -BackgroundColor Red -ForegroundColor White}
}
Now that you have your menu formatted the way you want it, we can jump into a brief walk through of how to setup the functions. In your ps1 script, you will want these functions above your code for the menu. If you changed the function names in your menu code then you will need to ensure the names line up here. Put your code for a given function in between the { } and when that function is called your code will be executed.
Functions Code:
###############################################
Function Function_One {
    write-host "Function One executed!"
}
###############################################
Function Function_Two {
    write-host "Function Two executed!"
}
###############################################
Function Function_Three {
    write-host "Function Three executed!"
}
###############################################
Function Function_Four {
    write-host "Function Four executed!"
}
###############################################
Function Function_Five {
    write-host "Function Five executed!"
}
###############################################
At this point, you have everything you need if you want to utilize PowerShell ISE to run this GUI menu. Continue reading if you don’t want to use the ISE.
There is one final piece of code that you will want to put at the very bottom of your script. This code forces the user to hit a key to exit the GUI. This will allow you to put error handling or success codes inside of your script which will be presented to the user before the GUI closes.
Exit Code:
Write-Host "Press any key to exit..."
$Readkey = $Host.UI.RawUI.ReadKey("NoEcho,IncludeKeyDown")
Final steps
To finalize this simple GUI, we need to do a few things to make it easy for others to execute it. In the following steps, we will create a shortcut that can be double clicked to launch the simple GUI.
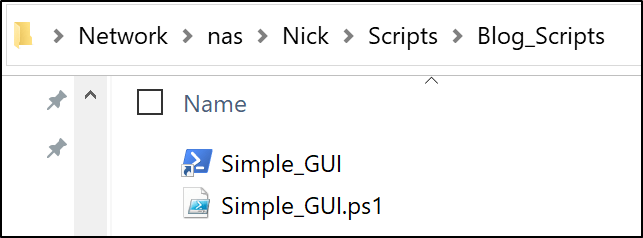
- Create a folder structure to house this script and a shortcut to the script. You can have the shortcut and the script in separate locations if you prefer, but for this example, they will be in the same directory. This would ideally be on a share that is accessible by everyone that needs to run this.
- Save the ps1 script you’ve created for this simple GUI in the folder from step 1.
- Create a shortcut to the ps1 script in the folder from step 1
- Right Click -> New -> Shortcut
- In the location field put in the following (replace the file path):
C:\Windows\System32\WindowsPowerShell\v1.0\powershell.exe -ExecutionPolicy Bypass -File "\\FullPath\ToYour\Script\Simple_GUI.ps1"
- Click Next
- Give the shortcut a name and then click Finish
- When you are done you should have something that looks like this:
Simple GUI in action
Finally, we can see the Simple GUI in action. Double click on the shortcut and we are presented with the menu.

Upon entering the number 5, you can see that the function was successfully executed and it is now waiting for the user to press any key to exit.

That’s it for now, thanks for reading!
Check out my other blog posts:
Media Sync: Organize Your Photos and Videos with PowerShell
Do you have photos and videos that you have taken over the years that are scattered all over the place? Do you want to have all your photos and videos organized? Do you want all your photos and videos to have a standardized naming scheme? If you answered YES to these questions, then this is…
NetNeighbor Watch: The PowerShell Alternative To Arpwatch
In this post, we are going to setup NetNeighbor Watch on a Raspberry Pi. NetNeighbor Watch can keep an eye on your network and send you an email when a new host is discovered. NetNeighbor Watch is done completely in PowerShell. The results are very similar to those of arpwatch. NetNeighbor Watch is for anyone…
Generate a Citrix Desktop Report Based on Active Directory Users
In this post, we are going to merge data from two different sources to generate a report that can provide insight into your Citrix environment. I will show you how to combine Active Directory data for the users in your domain with Citrix data. This report will provide you with the following knowledge: Users that…
Creating a PowerShell Module to Improve Your Code
Do you have PowerShell code that you reuse in your scripts over and over? Do you have server names hard coded in variables? Are you using a text file or CSV file to import server names? Do you find yourself only utilizing one server out of a cluster of servers to make your PowerShell commands?…
Generate a DHCP Report Via PowerShell
Today we are going to look at how to generate a DHCP scope statistics HTML report by using PowerShell. This report will give you one location to see all of your DHCP scope statistics across all of your Windows DHCP servers. It will dynamically pull the DHCP servers and associated DHCP scopes within your Active…
Increase VMware VM Disk Size with PowerShell
In this post, I will cover how to use PowerShell to increase the disk size of a Windows 10 VM running in a VMware vCenter environment. Automating simple but time consuming tasks like this can save precious time for your support staff or yourself. There are two parts to accomplishing this task; first we need…
Manage Citrix Tags with PowerShell
In this post, we are going to cover how to manage Citrix tags with PowerShell. Citrix Studio is a great tool, but it can be very time consuming especially if you have to do bulk tag actions. Citrix tags can be used in several methods, but this post is focused on desktop tagging. This post…
Create a Text Box to Accept User Input for PowerShell GUI
Do you have a PowerShell GUI that needs to accept text input? Maybe you want to be able to copy and paste a list of computers, ip addresses, user names or some other data. I will show you how to add a text box into your PowerShell GUI to handle that input. If you haven’t…
Utilizing PowerShell Out-GridView as a GUI Alternative
In my previous post, I showed how you can build a simple menu driven PowerShell GUI; check it out here. To further improve upon that simple GUI, we will go over how to use Out-GridView. Out-GridView is a built-in powershell cmdlet that sends the output from a given command to an interactive window. This post…

8 thoughts on “How to Create a Simple PowerShell GUI”